SeeCon
saw set-up inspection
The SeeCon saw set-up inspection system
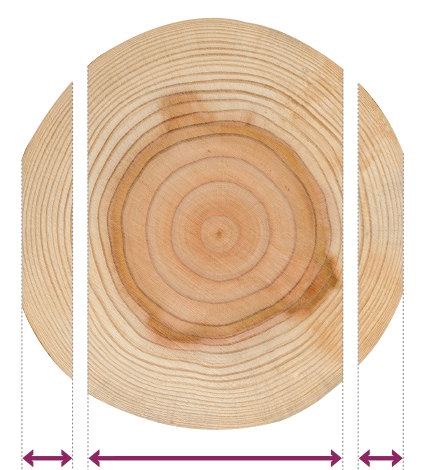
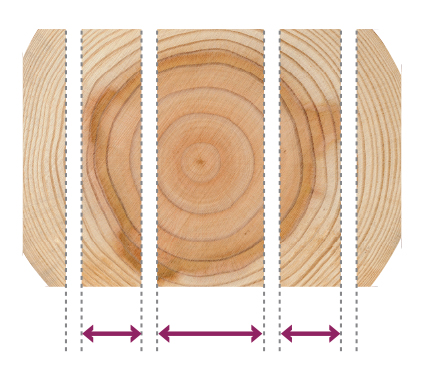
Each millimeter sawn oversize will cause the sawmill a material loss of about two percent. This is chiefly due to the reducing length of the side boards sawn from conical logs.
The patented SeeCon system solves the problem.
It inspects sawing deviations with extreme precision and eliminates oversize sawing during the first phase and secondary break down sawing. SeeCon’s precision has been proven by more than 200 installations all over the world.
SeeCon makes it easy to adjust the feed and cutting speeds so as to compensate for seasonal and log size variations. In addition, SeeCon enables the use of increasingly thinner blades, which may further increase the yield by one percent.
Currently, SeeCon is the only functional system to measure the success of the sawing process. Its measurement precision is fully comparable to that of vernier caliper, with the difference being, however, that the number of measurement results is several million times higher. All other optical technologies fail to produce corresponding results.
From millimeters to millions
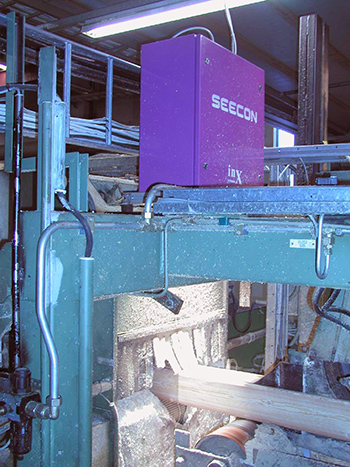
The SeSeeCon measures and analyses the sawing precision, deviations and errors on a continual basis. The system immediately issues an alarm if the sawing fails to meet the specified tolerances. SeeCon is installed immediately downstream of the saw unit. This means that it can identify and point out the cause of problems, such as blade breakdowns, snaking blades or malfunctioning sawblade set-up and feeder equipment.
Deviation monitoring also enables the minimization of oversize sawing. Once the exact deviation is known, the sawing tolerance can be set with the correct accuracy to tenths of a millimeter. In this case even a tenth of a millimeter matters since the oversize sawing of one millimeter amounts to the loss of one million euros at an annual turnover of 50 million euros.
The deviation measurements’ accuracy also enables the sawing method optimization. For example, the kerf can be safely reduced since it is possible to ensure that deviations cannot increase due to the use of thinner sawblades. This makes it possible to reduce the kerf by even more than a half millimeter thus reaching additional material savings of about one percent.
Information helps estimation
Thanks to reliable quality control, sawblade replacements can be scheduled correctly. Replacements are not made too early and blade breakdowns are avoided. This eliminates any unnecessary disturbances and boosts the production efficiency.
With the measurements’ results as the basis, SeeCon compiles real-time data and cumulative information on the sawmill operation. This information is used to monitor the production efficiency and quality on a daily basis. On the other hand, the information can also be used in various ways for the sawmill’s long-term development.
Information analysis is enhanced by using the SawBlade Manager sawblade monitoring system together with the SeeCon system. This joint use provides valuable information, for example, on the behavior of individual blades during the sawing process, on blade maintenance, on maintenace schedules and on other related factors.
Ensuring precision through special optics
The SeeCon technology is based on the use of a line-scan camera and patented parallax correction special optics. The system measures the thickness of every piece at 1-3mm intervals throughout the log length with an accuracy of +/- 0.1mm. The measurement accuracy is not affected by piece height variations and the method is also applicable for roundwood measurements. This means that the SeeCon system’s measurement precision and functional reliability are in a class of their own.
Office electronics is no match for this line of work
The system electronics was designed for industrial conditions and the equipment processing power was dimensioned for machine vision applications that require massive computing power. This ensures an equipment reliability and a measurement accuracy which cannot be achieved by computers that are designed for office purposes.
The user interface complies with the specific needs of wood processing, providing a clear view of the production in progress. The user sees the measurement results of all pieces being processed in a clear graphic form. Any results outside the tolerance values immediately trip an alarm and turn red at the same time.


